Friday, December 30, 2011

Guest Post: Adriane from "Half a Bite"

We have some exciting guest posts coming up in the future - from several mamas who are just entering the cloth diapering world regarding their journey! We're also looking for at least one post about using cloth diapers at daycare.

Our first "new" cloth diapering mama is Adriane, mother to a beautiful five-month-old named Darian. She recently started cloth diapering and has this to share (you can read the original at her blog, Half a Bite):

_______________________________________


Fluffy bums

So, I use cloth diapers on Darian's bum. I love it now, but I made a LOT of mistakes in the beginning which could have steered me back to disposables had I not spent a significant amount of money on the things.


The Prep


Let's start at the beginning. Long before I was pregnant, I came across a thread on The Nest about cloth diapers. I was intrigued. So I looked it up, read about the virtues (Save the environment! Save money! No rash! No poopsplosions! And they're cute!), and decided that when the time came, I'd give it a shot.


Victor wasn't convinced, but since I'd be the one staying home, changing most diapers, and doing laundry, he agreed.


Once I was pregnant, I tried to read up, but was overwhelmed without actual samples to look at. At a friend's suggestion, I visited a local cloth diaper shop. The woman in the shop gave us a riveting demonstration of the different types, and we went ahead and bought the whole starter kit of 30 brand new diapers plus all the accessories.


From what I had read earlier, I thought that all-in-ones would take too long to dry, and pockets would be too much effort to stuff. So I got some Totsbots Bamboozle bamboo fitteds with covers, and some Grovia all-in-2s with snap in cotton soakers, all "one size" which would fit from about 9-35 lbs. (I'd explain it all but others have done a better job, so you can read more on The Awesome Cloth Diaper Blog.)


Victor and I had agreed to stick with disposables for the newborn stage, and then transition to cloth as parenthood became more manageable. I figured that the baby would start fitting in the one-size diapers within about a month. I was excited.


Starting out


Darian was born at 7 lbs 11 oz. The newborn-sized disposables lasted about two weeks before he started outgrowing them and we decided to try out a Grovia. He was probably around 9 lbs by then.


I snapped it to the smallest setting, put it on him and it looked HUGE. A couple of hours later, I changed the diaper and was disappointed at how wet it felt. I thought there was no way they'd last through a night.


See? Huge, right?


At one point, he had an explosive poop which scared the cat, but more importantly, leaked all over the place.


We had slightly better luck with the Bamboozles, but they were also way too bulky.


Not only that, but Darian was a very gassy newborn, and the bulky cloth diapers made it difficult for us to deal with that. Thin disposables, being much thinner and more flexible, made it easier for us to pump his legs to help with the gas.


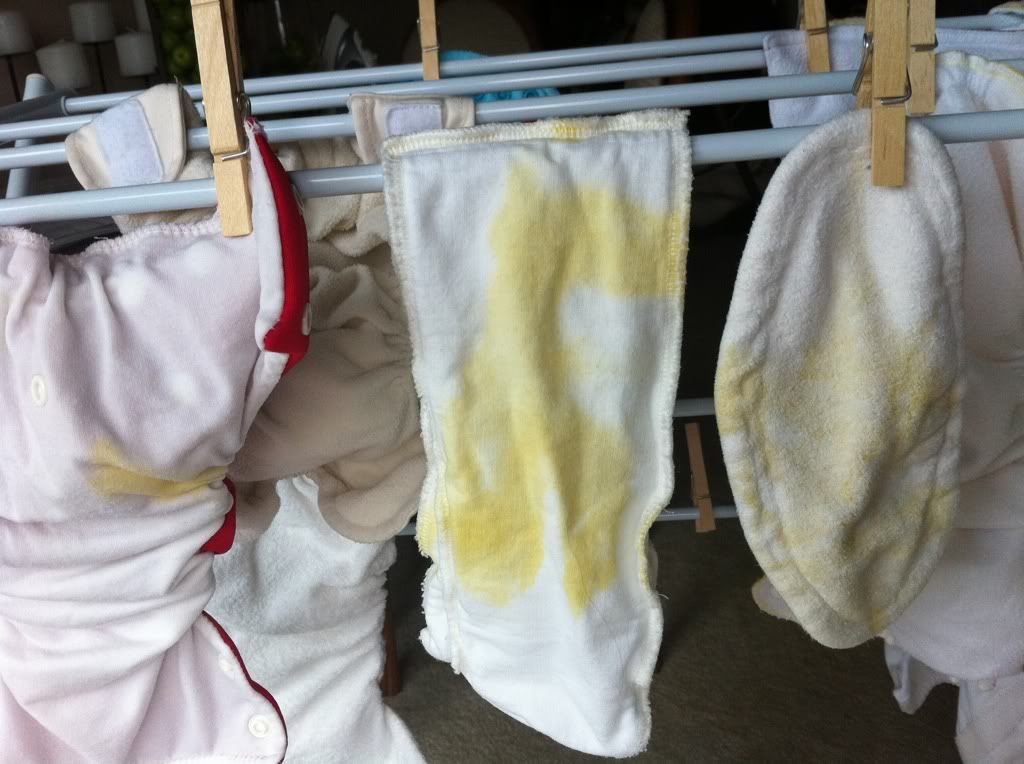
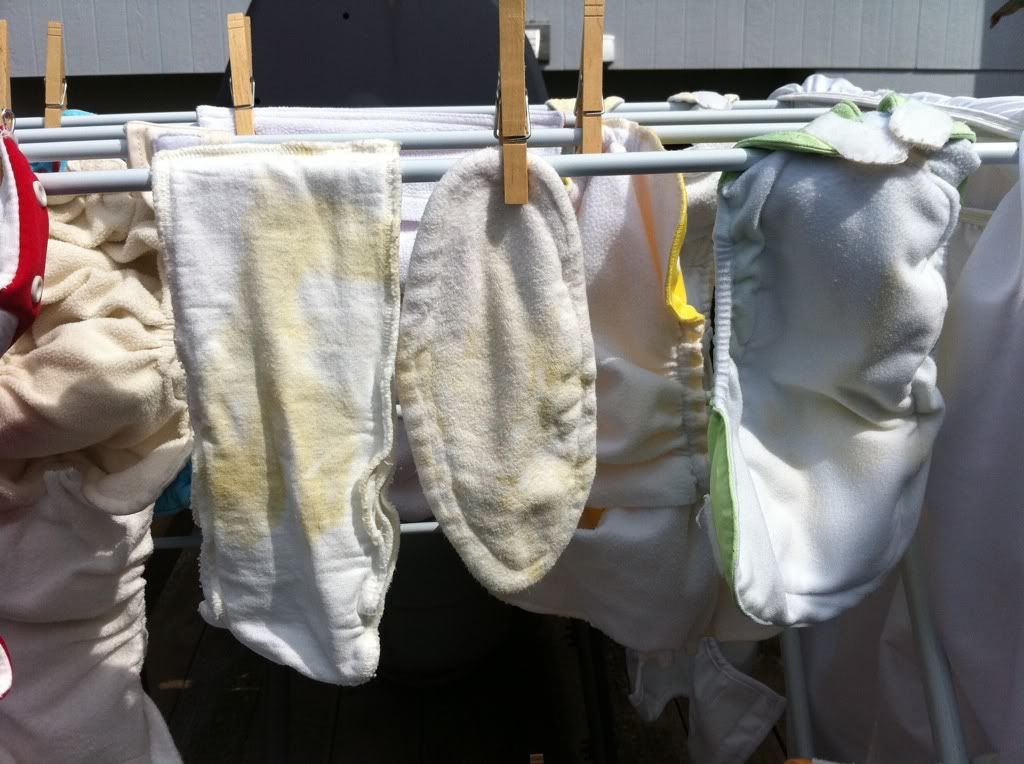
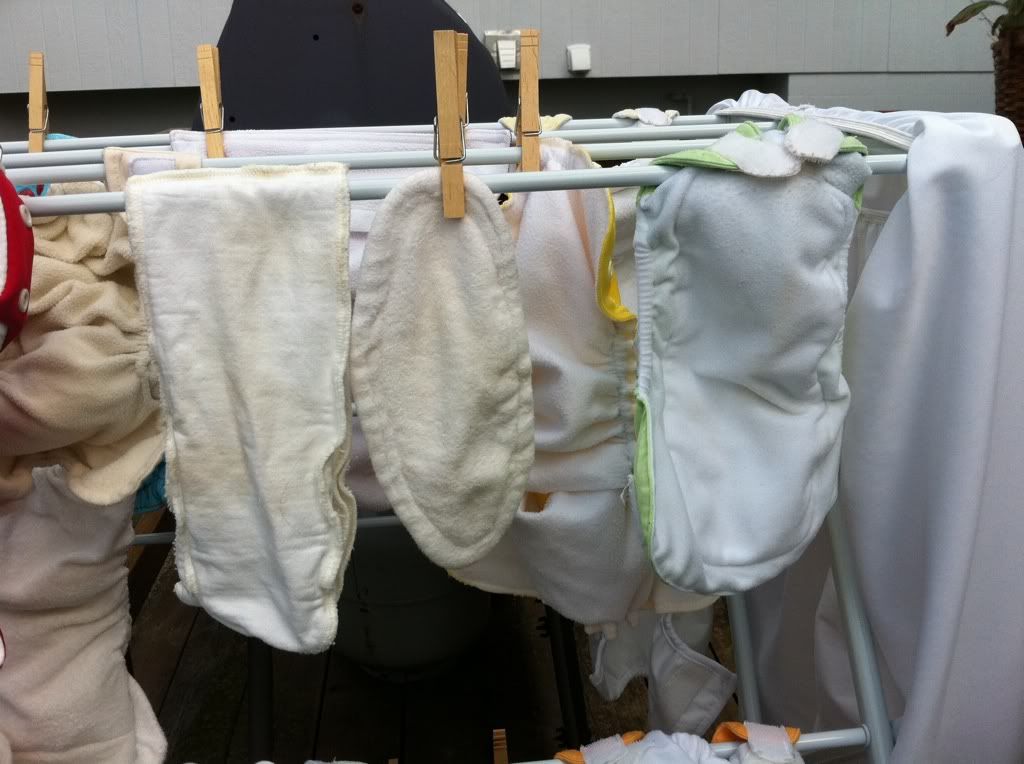
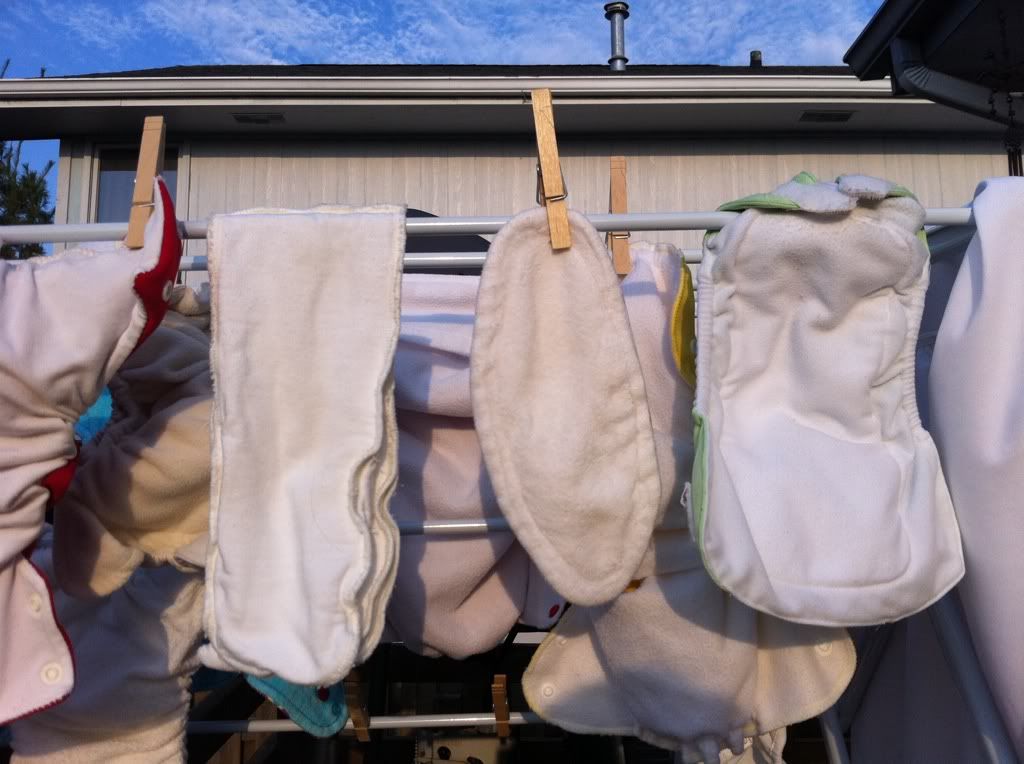
Finally, I did find the laundry a little overwhelming. Both the Bamboozles and Grovias seemed to take forever to dry.


I started to think this was a mistake, and an expensive one.


Growing into them


So, we kept using mostly disposables through the first three months. I kept using the cloth every now and then, but by no means full time.


I also took back some of the Grovias, and exchanged them for Fuzzibunz.


Fortunately, I loved the Fuzzibunz - they fit Darian well, they are fairly trim, and the microfibre inserts dry quickly. And stuffing pockets wasn't as big a deal as I thought!


Happy bum, happy baby!


When Darian turned three months old, Victor went back to work. Left to my own devices, I started using cloth full-time. I braved night-time cloth diapering with the Bamboozles and lo and behold, they worked! I joined cloth diaper buy/sell/trade communities and sold off some of the Bamboozles in order to buy some more used Fuzzibunz (saving enough Bamboozles just for night-time use).


Also, Darian started growing into the diapers, and outgrowing his gas issues, so that they bulkiness was no longer an issue. I started noticing that the cloth was way better at containing poops (it wasn't a big issue when Darian was a newborn because poops were regular and small... but as he got bigger, they got bigger and more forceful). And I got into a groove with the laundry.


So now, I'm loving it. I almost never deal with diaper leaks, and if I do, they're very tiny. I even use cloth when we go out - even though the diapers are bulkier to carry, it's so much easier to do that than change clothes while we're out. Today was our first garbage day without a single diaper in the trash.


And they're delicious!


If I could start again...


- I'd start with trying a few different types (natural and synthetic fibres, pockets, AIOs, AI2s and fitteds) rather than deciding that one or two would work for us
- I'd try to start with some cheaper brands or buy used
- I'd consider buying newborn fluff, or at least realize that one-size wouldn't work for at least a couple of months
- I'd join a community where I could chat with other cloth diapering mamas and learn a lot more


So, that's my story. I realize that a lot of these mistakes have been discussed in blogs and whatnot (including the one I linked above), but hey... live and learn.

Tuesday, December 27, 2011

Ok, I have my diapers...now what?

Once you've gotten a stash together, whether you purchased a trial, nabbed some sale diapers, found great used deals, or just said to hell with it and bought new ones at full price, the next steps can be overwhelming.

Do you need to prep them? How do you prep them? Do you need to strip them? How do you strip them? Do you just start....USING them? Do you dive in full force? Do you start just at home and continue to use disposables while out and about? What about overnight?

Prepping and Washing

The easy part of that question is the prep and washing!

New Diapers 
If they're new, follow the instructions the maker gives. In general, you can divide your diapers as follows:

Synthetic fabrics (These are usually stay-dry - most pockets and AIOs. Microfiber, microfleece, and suedecloth are all synthetics):  Wash once. That's it! They don't need any prep; you're just washing to get any nasties from the manufacturing process out. 

Natural fabrics (These are not stay-dry and include most fitteds and many AI2 inserts. Cotton and hemp are all natural fibers): Wash 5-6 times. Why so many? Natural fabrics, particularly cotton and hemp, have oils in them that must be washed out before they become absorbent. They may be ready to use after three or so washes, but they'll be most absorbent after five to six. You don't need to dry between every wash; I usually wash three times, dry, wash three more times, and dry again.  And while you don't want to do these washes with other diapers (you don't want to transfer the oils to other diapers), you can wash them with other clothes.  If your cotton or hemp is in the form of an insert or prefold without snaps or elastic, you can boil them for 20 or so minutes to avoid so many washes.  Once boiled, just wash with detergent once and dry.  (I've boiled inserts with snaps before and it's been fine, but they could easily melt so I don't recommend it.)

A note about bamboo:

Bamboo is usually categorized in the "natural fabrics" section, but in reality the process to make bamboo fabrics usually turns it into rayon and strips the oils out. Bamboo usually does not need to be prepped  the same way as cotton and hemp.

Used Diapers 
If your diapers are used, you probably just have to wash them once and you're good to go. However, inspect the diapers beforehand, and you're hesitant about them for any reason you may want to strip them. You may also find you need to strip them after you've used them if they are repelling. You can visit the FAQs for information about stripping diapers.

Drying Diapers
You've probably heard it before. Line drying diapers is best. And it is. The dryer is hard on cloths. It makes them wear out faster (this goes for ANY clothes, not just diapers!). And it's especially hard on PUL (the plasticky waterproof fabric in a lot of diapers), aplix/velcro, and elastic. So if you can, line dry your diapers. Not only will it help them last longer, it will also get rid of any stains! (It's magic!) You don't have to have a backyard or even a house to do this - you can do it on a balcony or patio, and you can even do it inside. Yes, it will take a bit longer inside without the airflow and wind that the great outdoors provides, but it will dry!

That said, drying on a line isn't always possible. Maybe you don't have somewhere to do it.  Maybe you're in a hurry. Maybe you're lazy. (I admit to all of those at one point or another!) Drying in a dryer is okay. The world will not stop turning if you have to use a dryer. The key is to use the lowest possible setting. When I use the dryer (and I do quite a bit), I dry on extra low for 1 hour and 39 minutes. Why that time? It's the longest timed setting I have on my dryer. In that time, my diapers generally get pretty dry. I might have a couple fitteds or AIOs that aren't quite there, and if that's the case, I leave them hanging on the side of her crib for a couple hours. Is drying on low or even (gasp) medium or even (double gasp) regular okay? Sure. Every once in a while, if you're in a huge hurry or have a reason you need to get your diapers dry quickly, it's not going to ruin the diapers. They will, however, last longer if you do that as little as possible. One hint to help minimize dryer damage? Don't stretch the elastic on the diapers until they've cooled. Another hint: use wool dryer balls to help them dry faster (I like this shop on Etsy)!

If you do line dry, you might find that your natural-fiber diapers start to get crunchy or rough. There are several ways to combat this. You can pop them in the dryer for 15 minutes or so to soften them up (some people think they are softer if you dry them in the dryer for 15 minutes and THEN line dry them the rest of the way; some people think they are softer if you line dry and THEN put them in the dryer - experiment!). The faster they dry, the rougher they will be, so if you aren't sunning them and need direct sun, try putting them in the shade. You can also do an ecover soak or add ecover to your regular laundry routine. ecover is a cloth-diaper-safe laundry softener that uses all natural ingredients to soften clothes and diapers. You can do it as often as needed for fitteds and inserts; however, it will wear the PUL and TPU over time. For those types of diapers, try putting a ecover/water mix in a spray bottle, spraying the inner of the diapers, and letting it sit for a bit. Afterward, run a rinse cycle on the diapers. You can also "float" those types of diapers on top of the surface of an ecover soak, letting the soakers become immersed in the ecover/water mixture and keeping the PUL out of the water, floating on top.

Making the Leap

Okay! So you've got your diapers washed and prepped and ready to go. They're just sitting in a big pile, staring at you.  This is the part where you just DO IT. Take off the disposable your kid has on and put on a cloth diaper! You can do it!  Seriously, stop reading this and go do it. I'm waiting!

Really, what's the worst that could possibly happen? You get a leak? If you've been using disposables, you've probably dealt with leaks before!  Remember: some cloth diapering is trial and error. Just like all disposables don't work the same for all families (have you seen the Huggies versus Pampers wars?), not all cloth diapers work the same. I'll be honest: some diapers might leak for you. It could be the wash routine. It could be the fit of the diaper. It could be user error (did you forget to put an insert in the pocket diaper?? Been there!) But be heartened! Once you have it figured out, they will leak MUCH LESS, and blow-outs will usually become a thing of the past.

Whether you use disposables overnight, while out and about, at daycare, etc., is up to you. My personal belief is it's far easier to just dive all in at once, but there are a lot of hard-core cloth diapering families that still use disposables when they are out shopping or for overnight. That is OKAY. Do what works for you!

Here are some hints for using cloth diapers in various situations:

Cloth diapering while out and about (link coming soon)
Cloth diapering while on vacation (link coming soon)
Cloth diapering at daycare
Cloth diapering overnight (link coming soon)

The biggest hurdle though? Just getting one on the butt! So really, there's no time like the present...throw a cloth diaper on that kid!

Thursday, December 22, 2011

Guest Post: Laura from "Welcome to my (Cloth Diaper) World

A good friend, fellow cloth diaper mom, and mother to a beautiful daughter wrote a great post on some of the different "need to know" things regarding cloth diapering.  She graciously allowed me to post it here as a guest post! Thanks Laura!  Be sure to visit her blog, "Welcome to My (Cloth Diaper) World."

_______________________________________________


What you need to know

Handy (basic) Cloth Diaper Information

There are (what feels like) a million different types and brands of cloth diapers available today. It’s definitely not like in our parents' days of cloth diapering. It can be hard to distinguish between an AIO (all in one), fitted, AI2 (all in 2), prefold, cover, hybrid, etc… especially if you are just getting started. Here I will describe the different types of diapers, as well as name a few of the brands of each type. Yes, there’s a lot. And yes, it can sound overwhelming. I promise, once you get to know the basics, it’s pretty easy to grasp.

Types

Prefold – The most simple way to cloth diaper you baby is to use a prefold. You can either fold it onto your baby using one of the folding methods (newspaper, basic, twist, etc.), or fold it in thirds and place it inside a cover.


Fitted diapers - Usually made of cotton or bamboo, they also need a cover over them, since fitteds are not waterproof. They have snaps for aplix (Velcro) to close the diaper, and they often have a sewed in or lay-in soaker. There are many different brands of fitted diapers (Thirsties, TotBots, etc.) and many work-at-home-Mom (WAHM) fitteds as well.


Pocket diapers - have a built in waterproof cover and require a separate insert for absorbency. This is probably one of the most popular way to cloth diaper these days. There are tons of brands/styles of pocket diapers - most common are Bum Genius, Fuzzibunz, and "cheap" eBay diapers.


All-in-one (AIO) - are the most like disposables. They are simply on/off, no insert to stuff, no cover to put on. These are great for babysitters, granndparents and daycare. Popular brands of AIOs are Bum Genius, Grovia, TotBots. The main "con" about AIOs is that they take a long time to dry.


All in Two (AI2) - Are almost as simple to use as AIOs. They have an additional liner seperate from the "body" of the diaper, which makes for easier washing and faster drying. An example is SoftBums.


Hybrid diapers - Are sort of a mix between an AIO and a pocket. They have a waterproof cover and a snap in/lay in liner, and the liner can be changed out for a new one, while reusing the same cover (as long as it's not soiled). Examples are Grovia, Flip and Monkey Doodlez "Tuck And Go".


Terms

Inserts - usually made of microfiber, they are used to "stuff" pocket diapers. They can also be made of hemp or bamboo, or a combination of these. Inserts are the absorbent part of pocket diapers.


Doublers - Are used to add extra absorbency to any type of diaper, for overnight or heavy-setters. Doublers are usually made of fleece or hemp.

Wet bag - A small bag with a waterproof liner, to be used in a diaper bag to hold soiled cloth diapers.

One Size - A term used to describe a diaper that can be used from nearly newborn til toddler age. Many pocket diapers are One Size. They usually have 3 rows of snaps that, as you unsnap them, make the diaper "grow".


This post will be updated periodically with more basic information!


(All pictures in this post taken by me, Laura McKee)

Thursday, September 1, 2011

Treating the Beastly Yeastlies.

Recurring diaper rash that won't go away? Looks like red, raw clusters of dots? It could be a yeast rash and not a regular diaper rash. (Do yourself a favor and DON'T Google it...there are some baaaad yuck yuck brain bleach pictures out there. But if you're REALLY desperate for visuals - here or here. These are graphic/bad but not brain bleach bad.)

If you Google (does Google get a commission every time I say that? Google Google Google!) "yeast and cloth diapers," you will discover that a) it takes a bit more work to get rid of a yeast rash than it would if you were using disposables and b) there are a great many methods to getting rid of it. Because I haven't tried them all, all I can do is tell you what worked for us.

Many people feel like they need to use disposables while treating yeast; we did not have to.  However, there is certainly nothing wrong with going that way.

By the time I discovered it was yeast at a well baby pediatrician visit, it'd been there for at least a week while I thought it was regular diaper rash. So when I figured out what it was, I felt like I had to work quickly to get rid of it...it looked painful! Poor kid. And the routine I stumbled upon worked like a charm, and worked very quickly.

We did three things concurrently:

1. Bleach (on the diapers) UPDATE: See note at bottom of post! I will now use grapefruit seed extract or a mixture instead of just bleach.
2. Sun (on her and the diapers)
3. Monistat cream (on her)  UPDATE: I switched to using CJ's Spritz Plus (more natural) to start with and only doing Monistat if it persists.

To start, each load of diaper laundry I did, I included 1/4 to 1/2 cup of bleach. I didn't measure exactly so I couldn't tell you the exact amount, but somewhere in that area. I did an extra rinse the first time I did it (on top of the extra rinse I already do, so an extra extra rinse), but I forgot the next time and it seemed like all the bleach was out, we didn't have any performance issues, and she didn't have any reaction, so after that I just did the one regular extra rinse. You may want to do an extra extra rinse just to be sure. We always wash with a "quick wash" on cold with no detergent, then run the "whitest whites" setting which is a hot water cycle (and includes the aforementioned extra rinse) using Dropps detergent. NOTE: I have a front loader with a separate bleach compartment. You should never put bleach directly on diapers. I take no responsibility for any bleach spots or yellowing of diapers! It's always a risk you take with bleach. It didn't happen to me, but that doesn't mean it won't ever happen! UPDATE: See mixture recommendation at the end of this post.

After each load was done, I sunned the diapers. SO IMPORTANT. To explain this, know that yeast likes dark, moist areas (so is it any wonder it likes to take up camp in vaginas and baby butts?) and it *hates* sun. Yeast and sun is like Hitler and ice cream (I assume Hitler hated ice cream, being evil and all). I kept them outside in bright sun, making sure that the inside of the diaper that was against her was facing the sun, for several hours. This wasn't a big deal, since I usually try to dry anything with PUL, elastic, or velcro in the sun anyway - but this time, I included all the inserts and soakers and wipes as well. If it touched her butt, it got sun.

I also made sure that she had naked butt time every day - in the sun whenever possible. I kept most of her body in the shade, and just exposed the area with the yeast rash to the sun (this involved holding her legs like I was wiping her during a diaper change, to expose the goods to the sun the best). I did this at least once a day for five or so minutes at a time (some days more than once). This gave the area a chance to get nice and dry, and again - yeast hates sun and the sun is a natural antifungal and disinfectant, so doing this really kills it at the source. This is much easier with a non-mobile baby than it is with a crawler or walker, but it can be done!

Finally, twice a day, I put Monistat cream on the rash (ok, I'm cheap, so I used the generic version). When I did this, I used a fleece liner to prevent the cream from getting on the diaper and washed the liner separately with our clothes - and sunned the liner when it was washed. You do have to look a bit to make sure you're getting the cream and not the suppository version. UPDATE: I discovered CJ's Spritz Plus, and it's worked wonderfully. I now use that to start with and only go with Monistat if necessary because it's extra stubborn. UPDATE #2: Some babies may have a sensitivity to the CJ's Plus. I'm not sure what in it causes the sensitivity, but because of that I wouldn't recommend using it all the time - only if battling yeast - and watch to make sure that it's not bothering them.

With the combination of these three treatments, the yeast cleared up almost overnight. I continued the laundry routine for a week or so after it was gone, just to be sure that *every* diaper had the bleach/sun treatment. A few weeks after that, I got thrush AGAIN, which meant that she was more likely to get a yeast rash AGAIN. Sure enough, during my vigilent checks, I noticed a couple of the same red spots pop up. I immediately started the bleach/sun/Monistat [CJ's] again and it never got worse than two or three dots and cleared up extremely quickly.

So that's what worked for us. Your experience may vary, but I think all three parts of the treatment are equally important - the sun is one that's often overlooked but does so much. And it's free and natural! I also started taking probiotics and AZO Yeast pills every day to help prevent another occurrence of thrush, which will help prevent another yeast rash on her (though they are linked, you can have one without the other).

(By the way, if you get thrush, these all are also great ways to treat it: put your nursing bras outside in the sun so the inside of the cups get treated, and also to expose your nipples to sun for a little bit each day...if you can do so without getting arrested. And then some Monistat cream on your nipples twice a day as well, being sure to wipe it off before nursing.)

****************************************

UPDATE: I have since learned that while bleach works, it may not be the most effective way to treat yeast on diapers. Though it kills active yeast, it does NOT kill yeast spores. To kill yeast spores, treat with grapefruit seed extract.  This seems to be the only natural way to kill yeast spores.  For normal disinfecting, use 10-15 drops per load. For heavy disinfecting, use up to one teaspoon per load.  Be sure to get grapeFRUIT seed extract, not grapeseed extract. Note that I have not yet had an occurrence of yeast to try this with, so I can't speak personally about the effectiveness, but I have heard great things. For more on disinfecting, look here:

http://allaboutclothdiapers.com/simple-effective-ways-to-disinfect-cloth-diapers/

UPDATE #2: This combo of bleach, tea tree oil, and grapefruit seed extract seems to be a winner for a lot of people (I'm sorry, I can't find the original source - if it's yours speak up and I will credit!):

Use 20 drops Tea Tree oil and 20 drops of Grapefruit seed extract and 1/4 cup of bleach in your prewash. Then wash as normal - if you can, turn up your hot water heater to 130 (don't forget to turn it back down!). The bleach kills the yeast the TTO and GFE kills the spores.


Eww! Diaper Stains!

Let me put this out there first:

Poop stains.

GASP! What??

Yes, it's true. Your diapers will get stained at some point. You can minimize this with a good wash routine, and some diapers stain less than others. For example, microfleece and suedeclothe hardly stain at all.  However, most fitteds and natural fiber diapers? They will stain up the wazoo.  Do you have to worry about stains? Not really. The diapers are still clean, even if they stain. It's much like if you wash spaghetti sauce in a Tupperware container and it gets tinted orange. Still clean, just stained.  But many (probably most) people would rather use diapers that LOOK clean as well as ARE clean.

So what do you do?  The answer, my friend, is blowing in the wind....

...not really. But it does involve the great outdoors.  For stains, the best thing is...SUN.

Here's a progression of diapers on a line.

Some lovely bright yellow breastfeed poop stains will be our test subjects:


After just FIVE minutes in the sun:


 After twenty minutes, they are nearly completely gone:


And after half an hour, they are completely gone!


MAGIC!

Wednesday, August 17, 2011

Wash Routines

We are working to get a list of wash routines for specific washers and dryers together.  Add yours today!


Wash Routines

Tuesday, June 21, 2011

Wednesday, June 1, 2011

Diaper Type Video

Along with the "Cloth Diaper 101" video series that was linked a little while back, here's another great video that explains the different types of cloth diapers for those that are just starting out or are a bit overwhelmed.


The video goes hand in hand with this blog post from the Eco-Friendly Family (a great resource for all things green!):

Cloth Diapers: So Many Choices!

Tuesday, May 31, 2011

Cloth Diaper Rules

This is a fantastic article that re-iterates much of what we've said on this blog before!
______________________________________________________________

A Cloth Diapering Addict's Rules
Originally featured at The Cloth Diaper Whisperer (check out their weekly Fluff Friday giveaways!).

I began cloth diapering my now seventeen-month-old son, Sullivan, a litle over a year ago. What started out as an attempt to rid him of horrible diaper rash created by disposables has becoming an all-consuming obsession. As odd as it seems, cloth diapering is now a huge part of my life. I write about it. I dream about it. I stalk diapers on second-hand sites. I have become good friends with many cloth diaper company owners and fellow cloth diapering mamas. Choosing to use cloth on my son's bum has been one of the best parenting decisions I've made. It's also one big, endless learning experience. I've dealt with every stone cloth can put in my path: leaks, rashes, ammonia stinkies, empty PayPal accounts, and occassionally having to explain to my husband why I absolutely, positively, NEED that new diaper RIGHT. THIS. MINUTE. But through it all, I've been able to help other mamas on their paths to choosing cloth. Through my trials, I've developed a few rules that help guide me with my cloth journey.

1) Nothing is a rule is cloth.
I know, confusing, right? Here I am, laying out my rules, only to tell you there are no rules! But it's true. What works awesomely for one mama is going to be a disaster for you, and vice versa. Some things, you have to figure out as you go along. Read reviews, read blogger's opinions, and talk to other moms about what works for them. However, in the end, remember that cloth is a "to each their own," adventure.

2) Don't purchase an entire stash of one brand of diapers...unless you're 100% positive you will always love them no matter what.
A second half of this rule could be, "Don't sell off any of your diapers unless you're 100% positive you'll always hate them." I started with an entire stash of Grobaby diapers, only to find out they didn't work for us. I read reviews. I researched. I went with what I thought was the best brand for us, and I was wrong. So I had to sell off every one of those diapers in order to rebuild my stash. It was a pain in the heiny. On the other end of the spectrum, I can't tell you the number of times I've sold a diaper I just didn't think would work for us, only to find that a few months later, it would fit my son perfectly. Children grow and change, as do their diaper needs. What works for you in the beginning is probably not going to work at two years into cloth diapering. So keeping a variety of diapers in your stash is a great way to ensure you always have what you need to diaper. You don't have to spend a fortune. Having some prefolds, a handful of All-in-Ones or pockets, and a few fitteds and covers won't cost you a ton, especially if you look for good sales and second-hand diapers. But a bunch of different types of diapers will keep you from having to desperately search for a nighttime solution because your old stand-by suddenly fails.

3) Be careful with second hand purchases.
I love buying diapers second hand. I can give new life to a diaper someone else previously loved. More often than not, I end up with a high quality diaper at 50-70% the cost of retail. But sometimes, I get a real dud. The problem with second hand is that the seller determines the condition. "EUC" or "Excellent Used Condition" can mean a wide spectrum of diapers depending on who's deciding. Be sure to read the seller's feedback. Be sure they use tracking and delivery confirmation. Always pay with PayPal to keep your money safe. And have fun!

4) When you find a great wash routine, STICK WITH IT!
It's so easy to be lured into the world of cloth diaper detergents. Many work-at-home-mom detergents are proclaimed as the best for your diapers. To some people, Tide is the enemy and must be avoided at all costs. To others? Tide is the only thing that works. Enzymes must be used. NEVER use Enzymes! Everything you read is going to be conflicting. Ultimately, you have to figure out a routine that will work best for your diapers and your water. If you ever move, you'll have to figure out a whole new routine (possibly). You may end up with ammonia or stinkies at some point. Remember these basics; it's better to use too much detergent than too little. Build-up is not as bad as not removing nasties from diapers. Rinse, rinse, rinse. An occasional stripping does everyone some good, and sun is your best friend. After that, anything goes. Once you find what works for you, don't change your routine until you experience problems. Otherwise, you'll end up with diaper issues, and it can be too hard to pin point your problem.

5) Don't give up.
Even the most experienced cloth diaper mamas and dads run into issues here and there. It can be so frustrating when you just can't figure out what your problems are with cloth. Maybe night and naptime diapering is a struggle. Maybe your little one has gotten yeast or heat rashes. Maybe you're dealing with leak or repelling problems. Just remember, mamas that use disposables deal with problems, too. Every time your child grows, you'll going to have to make adjustments. Reach out to the cloth diapering community. There are thousands of moms and dads that would love to help you solve your problems. It may take a little while, but more often than not, the problem is a simple one with a simple solution. Once it's solved, you can enjoy a fluffy bum again!

Sally is a full-time SAHM of a seventeen-month-old son, Sullivan. She is married to an Army Officer, and they are currently expecting child number two due in August. You can check out Sally's writing and cloth diaper reviews and giveaways at Exploits of a Military Mama

Friday, April 1, 2011

Newbies and Newborns and Poop, Oh My!

A great round up of videos and articles at Dirty Diaper Laundry - articles for those new to the CD world, newborn vs. one-size comparison, even an article on the different types of poop and how to clean them!

(Update: She changed the way the articles are listed, so below are links to the tags involving newborns.)

Newborns
Newborn cloth diapering
One-size diapers and newborns

Monday, March 28, 2011

How many diapers do I need?

Here's a great article on the number of diapers you need for each diapering age:

How many diapers do I need?

Below is a helpful chart that they created - but note that their estimates are on the low end. For example, a newborn goes through about 12 diaper changes a day, so you would want a minimum of 12 diapers to do laundry daily, and more like 14 or 16 to be safe. I'd use the maximum that they list (i.e. 12 for the newborn daily washing) as the minimum number to get, rather than the high end number. How many is too many? Well...you can never have too many!

Age Daily Wash Every 2 Days Every 3 Days
Up to 6 mos 10-12 20-24 30-36
6-12 mos 8-10 16-20 24-30
12-24 mos 6-8 12-16 18-24
Potty Learning 2-4 4-8 6-12

Saturday, March 26, 2011

Tell me about diaper trials!

When you're considering cloth diapering, you'll often hear people caution you not to invest too heavily in any one specific brand or type of diaper (read the "building your stash" posts for more information).  One way to test out a bunch of different types of is to try a diaper trial. In a diaper trial, you pay a certain amount of money and receive a number of different diapers. Once the trial is over, you can return all of the diapers and get most of your money back (most place only put you out $10-20) - or you can purchase all or some of the diapers!

For a list of some of the trials available, click here and scroll to the very bottom! Each trial contains different items, so it's important to compare and contrast to find the one that's best for you!

There are a few things to remember about trials:

One downside to a trial is that there aren't enough diapers in the trial to cloth diaper full-time, so you can fill in the gaps with prefolds/covers (super cheap!) or (gasp) even disposables.

Keep in mind that just because you don't like the pocket (or fitted, or AIO, etc.) that is included in the diaper trial doesn't mean you won't like ALL pockets (or fitteds, or AIOs, etc.).  When evaluating the diapers, try to determine if it's something about the system itself you don't like (i.e. you hate stuffing pockets, or you hate the two-step system of fitteds and covers) or if it's something about the diaper itself you don't like (i.e. the fit, the closure, not absorbent enough, etc.).  If it's something just about the diaper itself that isn't working for you, a different brand in that type could still work, so consider not dismissing them entirely. 

Also, a trial only lasts a few weeks, and it can take time to get comfortable with cloth diapering. It can also take time to experiment and find what works for you and your child (i.e. diaper/insert combinations, fit, wash routines, etc.).  If you haven't figured it out by the end of the trial, it could simply be that you need more time to play around, or that the specific diapers in the trial aren't a good match for you - not that all cloth diapers won't ever work for your baby.

Finally, diaper trials have great stuff in them! But they don't have everything.  Most don't have wool covers or hemp inserts, for example - two things that many people have great success with. They all have a very limited number of brands, and as we've mentioned over and over, different brands work differently for different babies.

All that said, though, trials are a great way to give it a shot and see what you think for almost no risk! They are highly recommended by nearly everyone!

Wednesday, March 23, 2011

The Cloth Diaper Finder

Trying to figure out what diaper brand and type you should try?  Looking for a diaper that meets your very specific needs?

For instance...you want a diaper that is one-size, pocket, with snap closure, PUL outer, that's made in the USA? Now there's an easy way to find it! Enter your requirements into The Cloth Diaper Finder created by Dirty Diaper Laundry, and it will spit out a result! For those search parameters, the results are BabyKicks, Knickernappies, and Icredibella [I've never even heard of Incredibella...yet another diaper to look into!].

A one-size pocket under 13 bucks? Kawaii!

A newborn all-in-one with aplix? bumGenius or Smartipants!

It's not perfect yet: for instance, I put in dual-size pocket with aplix made in the USA, and got no results, but I thought Thirsties met those requirements. However, when I dug deeper I found out it's because they have Thirsties classified as a "sleeve" diaper versus a pocket diaper.   So you may want to try your search a few different ways to ensure that you're finding everything that meets your needs.

It looks like they are searching a database of 136 diapers and growing!  It's really fun to play around with.

UPDATE: They now have user reviews as well!
UPDATE 2: They simplified their categories, so Thirsties is now listed as a pocket.

Monday, March 21, 2011

What's the deal with diaper covers?

Rather than re-writing a whole new article when someone else has already done it so wonderfully, I'll just link you to her blog post.

All About Diaper Covers from The Mommy Goods

There are just a couple things I'd add:

One, there's another type of material that works identically to PUL, only it's called TPU.  Many diaper makers, such as Rumparooz, are starting to use TPU over PUL.  While PUL works great, it's not so great for the environment.  PUL is poly-urethane laminate polyester fabric that is created using a chemical process. TPU is a similar waterproof material that is solvent-free - it's the same polyester fabric, but instead of using a poly-urethane laminate that is done with chemicals, it's a thermoplastic polyurethane that is created with a heat bonding process.  It's lower in toxicity and better for the environment.  TPU is also biodegradable and will biodegrade in 4-5 years if composted. Since many people who cloth diaper have great concerns about the environment, this is something to keep in mind. (Wool would obviously be another environmentally friendly choice). Personally, I think that TPU is a tiny bit softer as well, but that could be my imagination.

Also, keep in mind that most types of wool often can stretch quite a bit to fit your child for a while; however, it is still a sized cover, and the same soaker won't take your child from birth to potty training. On the flip side, PUL and TPU covers can generally be purchased in either sized or one-size versions.

Both PUL and TPU can delaminate, which means that the waterproof part separates from the fabric part.  If this happens, you can try to return the diaper to the manufacturer for a replacement.  You can still use a delaminated diaper - be sure to line dry only! - but if the laminate part rips, the diaper will leak through the tear.  Line-drying PUL and TPU covers will help them last longer; however, both should be dried on high the first time you wash them to help seal the laminate (unfortunately doing that won't fix a delaminated cover).

Finally, if you put PUL or TPU covers (or diapers) in the dryer, do so on low heat (after the first initial high heat dry).  Try not to stretch the elastic in the diaper until it has completely cooled from drying to lengthen the life of the cover.

Wild Coconut Wear wool cover (soaker)

Thirsties PUL cover

 Thirsties PUL cover (open)

Wild Coconut Wear wool longies

WAHM wool soaker

Woolly Bottoms wool footies

Kissaluvs wool soaker

WAHM fleece soaker

Flip PUL cover (technically part of an AI2 system, but can be used as a regular cover)

Monday, March 14, 2011

What's the deal with one-size diapers?

First, what ARE one-size diapers? Are they the same as fitteds?

No! Fitted diapers are a TYPE of diaper. See the FAQs in the tabs above for a low-down on the different types of diapers. One-size diapers are a SIZE of diaper.

Diapers generally come in two types of sizes: sized and one-size. Sized diapers fit a very specific, limited weight range. For instance, they might be available in x-small/newborn (fits 6 to 12 pounds), small (fits 8 to 16 pounds), medium (fits 15 to 22 lbs) and large (fits 22 to 30 pounds). All sized diapers have adjustable waist options to fit both skinny and chubby babies (either using a hook and loop closure or snaps); however, the rise is set. Because your child is constantly growing out of one size and into another, going the sized diaper route can be pricey. Because they don't have any extra fabric to deal with, they are usually quite trim.

One-size diapers (often abbreviated as OS) are designed to take a child through multiple weight ranges and stages and often claim to work from birth to potty training.  One-size diapers have adjustable rises that allow the diaper to fit multiple weight ranges and child sizes.

They can go from very small to quite large:

A Rumparooz diaper on the smallest setting
 A Rumparooz diaper on the largest setting


A Rumparooz snap diaper on the smallest setting (left) and largest setting (right).


The rise usually adjusts in one of three ways:

Snap-down rises are the most popular. They have multiple rows of snaps on the front of the diaper that allow you to snap down the front of the diaper to different size settings.  To make the diaper the smallest, you would snap the top snaps to the very bottom snaps, causing the diaper to fold onto itself and become much smaller. To use it on the largest size, you just leave the rise snaps fully unsnapped.  Here's an example on a BestBottoms diaper, showing the rise snaps fully unsnapped all the way to fully snapped down:


Fold-down rises are most common on fitteds.  These diapers usually have a row of snaps on the waist that face the inside of the diaper. You simply fold down the top of the diaper to the correct height and use the inside snaps to close it.  Here's an example on a DoodleDypes diaper - on the top, the diaper as it normally looks; on the bottom, with the top folded over.


Some fold-down rises are snapless and must use a Snappi or diaper pins to close, as the SBish fitted below shows.


Toggle/button rises are the least common, used by only a couple brands. It's the hardest to explain! These don't have rise snaps, but rather allow you to adjust how tight the elastic is at the leg of the diaper, which also adjusts the rise by scrunching the diaper together and making it longer or shorter. In the picture of a FuzziBunz below, you can see the leg elastic sticking pulled out in the top picture, and if you look very closely at the bottom picture you can just barely see the hint of the elastic on both wings at the top of the diaper - this is how it looks for normal use when not being adjusted. You can pull this elastic tighter or make it looser to fit a variety of babies. This particular system uses buttons to lock the elastic in place; other systems might use toggles like you find on jackets.


Crossover tabs are another feature of many one-size diapers. To further the customization options of one-size diapers, most one-size diapers allow you to overlap the waist flaps to create a very small waist. You can see these crossover snaps in some of the pictures above, and below, you can see the wing has both male and female snaps that would allow the opposite wing to snap to this wing instead of the main part of the diaper.

In this Doodle Dype, you can see the white snaps on the bottom wing 
that allow the top wing to snap onto it.

The crossover wings snapped at the smallest setting.
Aplix, or velcro, diapers usually also offer the option of crossover tabs. As you can see in the picture below, the velcro tabs are two-sided, allowing the tabs to be fastened to each other.


Many one-size diapers also offer multiple inserts that allow you to customize the absorbency (and therefore the bulk) depending on the age of the baby wearing it and how heavy of a wetter they are.  Often this is in the form of a regular large insert paired with a smaller insert that can be used alone for newborns or with the larger insert overnight or for heavier wetters.

A bumGenius newborn insert/doubler (left) and regular insert (right)

Some all-in-one diapers such as the GroVia below have inserts that can be added and removed depending on the needs of your baby (you can see the smaller, snap-in insert laying across the bottom of the diaper).


Fitted diapers also usually offer a number of inserts and doublers. This Goodmama could be used alone, with the smaller insert alone, the larger insert alone, or both inserts.


 This bitti tutto comes with three separate inserts that can be snapped together in a huge number of configurations to customize your diaper as needed. 


So one-size diapers are GREAT, right?? One diaper to get me from birth to potty training? What a great investment! What a great amount of savings! How easy!!

Not so fast! One-size diapers ARE great and they do save a ton of money, and the vast majority of people use them for the bulk of their diaper stash. However, there are a few things to note:

1. One-size diapers will not fit newborns as a general rule. Despite the fact that they often claim to start fitting at 7 or 8 pounds, they usually will not fit a baby well until the baby hits around 10 or 12 pounds. If you have a very large, chubby newborn, you might be able to use them immediately, but don't count on it! If you are planning on having the majority of your stash made up of one-size diapers, you will need something different for the newborn stage. Many people use prefolds and covers during that time, since they're so cheap. Some people use disposables until their child fits into the one-size diapers. Some people buy x-small or newborn sized diapers. It's up to you!  Note: Some brands do have one-size diapers that get much smaller than other one-size diapers. Rumparooz, Happy Heiny, and Softbums are brands that are known to get smaller than most of the other brands. However, that doesn't mean they'll fit your baby immediately - you still might run into fit issues even with them, so you still may need a newborn solution.

2. One-size diapers can be bulky on anything other than the largest setting (and very bulky on the smallest!).  This might not mean anything to you, but some people are looking for trim diapers. Cloth diapers are already bulkier than disposable diapers, and one-size diapers are bulkier still, particularly when on the smallest rise. All that extra fabric has to go somewhere! If you're looking for trim, smooth diapers, you might want to consider sized diapers, or check out the review spreadsheet for one-size diapers that are rated highly for trimness (i.e. GroVia all-in-ones are known to be one of the trimmest one-size option).

3. One-size diapers may not last as long. Because they are used SO much and for SO long, one-size diapers may wear out faster than sized diapers. If you're going the one-size route, you may want to have a fairly large stash to spread out the wear and tear on the diapers (for instance, rather than using 12 diapers over and over and over, you could use 36 diapers in your rotation, which would mean each one is used less frequently).

If you like the idea of sized diapers but don't like the bulkiness or ill fit of one-size diapers, you can look for diapers that are hybrids. Some diaper companies, like AppleCheeks or Thirsties, have created diapers that come in two sizes, which offer a more customized fit (i.e. one size fits for 8 through 20 pounds, and the second size fits from 15 to 45 pounds) but also are slightly less bulky than one-size diapers.  However, again, there's a drawback - both of those companies are known for having a fairly significant gap between sizes. While they claim to overlap, a baby who has outgrown their size one diaper may still be too small for their size two diaper.

Despite the drawbacks, one-size diapers are a popular, economical choice that work well for most people. Almost all brands offer a one-size diaper option. Check them out!

Building a Stash, Part 2.

Continued from Building a Stash, Part 1

Ok, so you now understand why it might not be the best idea to drop a few hundred bucks on thirty of that diaper that looks super cute and has good reviews without trying it out on your little one first. But you want to start building your stash! Your baby is going to be born soon (or is already here) and those dresser drawers are just BEGGING for some fluff to fill them up!

You have a couple options.  One, you can do a diaper trial like the one offered at Jillian's Drawers.  These trials let you try a variety of types of diapers and brands, usually for a fairly low initial cost.  The one downside is that there aren't enough diapers in the trial to cloth diaper full-time, so you can fill in the gaps with prefolds/covers or (gasp) even disposables.  You can keep the ones that you like and send back the ones that you don't like - or send them ALL back and only be out $10!  It's a really great way to be introduced to multiple brands and styles of diapers. For a list of trials, to read more about them, and for some things to keep in mind when doing a trial, click here.


(pictured: Jillian's Drawer's trial)


Another option is to watch sales and used diaper sites (see the "Favorite retailers" tab at the top for a list of used diaper sites) and slowly build your stash one diaper and one brand at a time. It's like doing a trial in that you get a bunch of different diapers, except you can try even more brands and you're not limited to the diapers included in the trial package. On the downside, since you're buying the diaper outright, there's no one to send it back to or to refund your money if you don't like it. It also takes longer to get a good number of diapers. However, you can eventually easily get enough to diaper full time by doing this, and if there's a diaper that doesn't work for you, you're not out an entire stash - just that diaper! Often, you can even sell the diaper on one of the used diaper sites for the same price you paid if you have taken care of it.  Many moms will collect a number of diapers of every brand, shape, size, and type with the plan of trying them, keeping what works for them and eventually selling off those that they don't like.

You can also see if there's a local cloth diaper co-op or even a friend that is cloth diapering. If so, you might be able to borrow a few diapers at a time...for free!  You don't like it? No loss! You like it? Great! Return it and grab a bunch of your own!  Like the trial, this won't give you enough to cloth diaper full time at the beginning (unless your friend has a TON of diapers for you to borrow), but it's a great and CHEAP way to try as many out as you want to with no obligation!

Regardless of the route you go, I don't recommend trying more than a handful at a time - sitting and looking at 40 different diapers can be overwhelming. Keep it simple and try a few out at a time.  Otherwise, you might get frustrated and overwhelmed and confused (this is especially true for daycares and significant others, who often just want consistency!). If this means you don't have enough diapers to cloth diaper full-time, I recommend prefolds and covers to fill the gap while you experiment with finding your permanent solution. They are cheap and usually work well, especially if you get covers with double gussets at the legs.  You don't have to learn complicated folds and work with pins - just trifold the prefold and place it in the cover. Easy!

Of course, some people...like me...love looking at a pile of 40 diapers and experimenting, so diving in with dozens and dozens of diapers works for them.

Once you've played around and found diapers that work for you, you can start filling your stash with more of those brands, whether you buy them new, used, or on sale.

Will you end up with a stash that is 100% of that favorite brand or even 100% of a specific type of diaper? Often, the answer is no.  Many people end up with a large number of a specific brand or system that works for them, but then have other types thrown in for specific circumstances.

For instance: you might be an all-in-one (AIO) user 90% of the time, but use fitteds and covers overnight. Or you might use fitteds and covers 90% of the time, but use AIOs at daycare and on outings. Or maybe you prefer snap pockets, but your DH prefers aplix AIOs, so you have a 50/50 mix of the two.  Or you might have some cheaper brands on hand that you don't mind messing up (like if your baby needs to use antibiotics that will turn his poop atomic green and stain your diapers - it happens!).

(Note: When building a stash, keep in mind that most one-size diapers will not fit newborns at birth! For more about that, read this post. If you plan to cloth diaper from day one and you plan to use one-size diapers, you will need something different for the newborn stage.)

One last hint: take it slow, especially if you're still pregnant and your kid isn't here yet! Let me say that again: take it slow! When you start buying quickly and impulsively, you often end up with diaper regret. It's sooooo tempting to buy a bunch if diapers right away, when you first start thinking about cloth diapering, but try to resist.  Instead, watch for good used deals and sales and diapers that you really like. Otherwise, you could end up like me and have more diapers than you know what to do with (so much for saving money!) and diapers that you got at full price sitting in your stash that are now on sale for 10%, 20%, or even half off - or that you see in EEUC (extremely excellent used condition) for pennies on the dollar.  Diaper sales happen all the time and are usually great deals! Of course, if you read this blog you're way more educated at this point than I was, so you probably won't make the same impulsive mistakes I did! 

Also, keep it simple. Don't overthink it. Try a diaper. If you like it, great! Get more! If you don't, you can save it for later (if, for example, you don't like it for a reason that might be overcome with time, like it's too big for your child) or sell it. If you're ambivalent about it, try a couple other brands. You might find that in comparison, you really like it, or you may find another brand that you love more.

It can seem overwhelming and it can seem confusing, but you can do it! Just buy a diaper. One diaper is all it takes to start the process!

Finally, it can be addicting. Watch out and put a limit on yourself if you think you might get sucked in...it happens to the best of us!

(Once you have your diapers purchased, click here to see what to do next!)

Building a Stash, Part 1.

One thing you'll often hear as a newbie to cloth diapering is to not spend a ton of money on one brand or type of diapers before you're able to try them with your child.  The reason for this is because different types of diapers and different brands of diapers work differently for every baby.  Until you know for sure that a brand works for your kid, it's smart to hold off on buying three dozen of them, even if they ARE on sale.

But WHY exactly? You've heard great things about Brand X diapers and you know you want to use them!

Well, let's look at Suzy. Suzy was sure she was going to love all-in-ones (also called AIOs...they're so easy - they're just like disposables!), so she bought a ton of GroVia AIOs on the advice of a friend, who uses them and just adores them. However, when she started using them, she discovered that they take WAY too long to dry, and she hated not being able to adjust the absorbency easily, and she slowly realized that AIOs just aren't for her family.  Or maybe she loves everything about AIOs and that type of diaper is working well, but the GroVia brand specifically just doesn't fit her baby's thighs and they leaked every time. So all that cash Suzy invested in GroVia? Down the drain while she tries to figure out what DOES work best for her baby. They worked great for her friend, but not for her.

And this holds true for every brand and type. There is no one type or brand that is going to work perfectly for every family!

Another example: Jane thinks that she's going to love pockets (the benefits of AIOs but they dry faster and you can switch out the inserts!), so she did a bunch of research and found that bumGenius are well reviewed - and she found a great sale! - so she buys two dozen. But she soon discovers that she just hates having to fish out inserts from poopy diapers. Or maybe she discovers that she hate stuffing the pockets after washing them. Or maybe after using them she finds out that her child has a suedecloth sensitivity and can't use bumGenius diapers because of that.

On the other hand, Mary thought she would be frugal and got all prefolds and covers. But in using them, she discovered that the process of trying to fit a prefold and a separate cover on her wiggly kid who hates getting his diaper changed is just too much of a struggle. Or maybe she finds that with her kid's sensitive skin, she needs a diaper with a stay-dry feeling.

So Mary, Jane, and Suzy now have to try to find a brand that works for them, figure out something to do in the meantime, unload the stash that they have (and possibly lose money in the process), and buy more diapers.  Now COULD you get lucky and find that the brand and type you invested so heavily in work perfectly for you on the first try? Sure! Of course! But it doesn't always work that way.

(Note: Prefolds and covers generally get an exemption from this rule because they're SO very cheap (i.e. you can get an entire newborn system for less than $75 if you look for used diapers and deals) and even if you hate them, the prefolds can later be used as doublers, inserts, burp cloths, changing pads, etc., so you'll get use out of them no matter what.)

So what should you do? Your baby isn't here yet so you can't figure out what works for you, but you really want to start building up your stash! Or maybe your baby IS here, but you're still not sure where to start, and reading all this didn't clear things up at all.

It's time to move on to Building a Stash, Part 2!